 Irrelevant blabber: On one of my gymnastics blogs that I follow, I use a profile that lists my name as "Hava Martini" - it's kind of like a drag name - you know, like "Orna Mint," "Della Catesson," "Candie Wrapper," "Anita Cocktail,"and such. Well, today, instead of a happy hour bloody mary, we decided it was a good time to enjoy a martini - as in just "Hava Martini!"
Sunday, July 31, 2011
Hava Martini
Irrelevant blabber: On one of my gymnastics blogs that I follow, I use a profile that lists my name as "Hava Martini" - it's kind of like a drag name - you know, like "Orna Mint," "Della Catesson," "Candie Wrapper," "Anita Cocktail,"and such. Well, today, instead of a happy hour bloody mary, we decided it was a good time to enjoy a martini - as in just "Hava Martini!"
I know that in this day and age you young folks think that "martini" can include all sorts of vodka concoctures with flavors and infusions and fruits and flavorings - but you would be wrong. "Martini" by it's very definition from the old days - is GIN. Dry, up, stirred or shaken - but GIN. If you have the audacity to order a "vodka martini" you should have to specify "vodka (imposter) martini."
 I had picked up a new variety of gin on sale at the BevMo - a discount liquor store here in LA - "Indigo, by Larius" imported from Spain. We decided to try it out this afternoon. It made a very smooth martini, if lacking a bit in the juniper flavor that one comes to expect from a martini (notice how I didn't have to specify "gin" because martini means gin!)

Set out your favorite martini glasses; grab the garlic-stuffed olives and skewer two per toothpick and place in your glasses (if you have time, you can put your glasses in the freezer for a bit before the cocktail hour - for an extra chilled beverage).
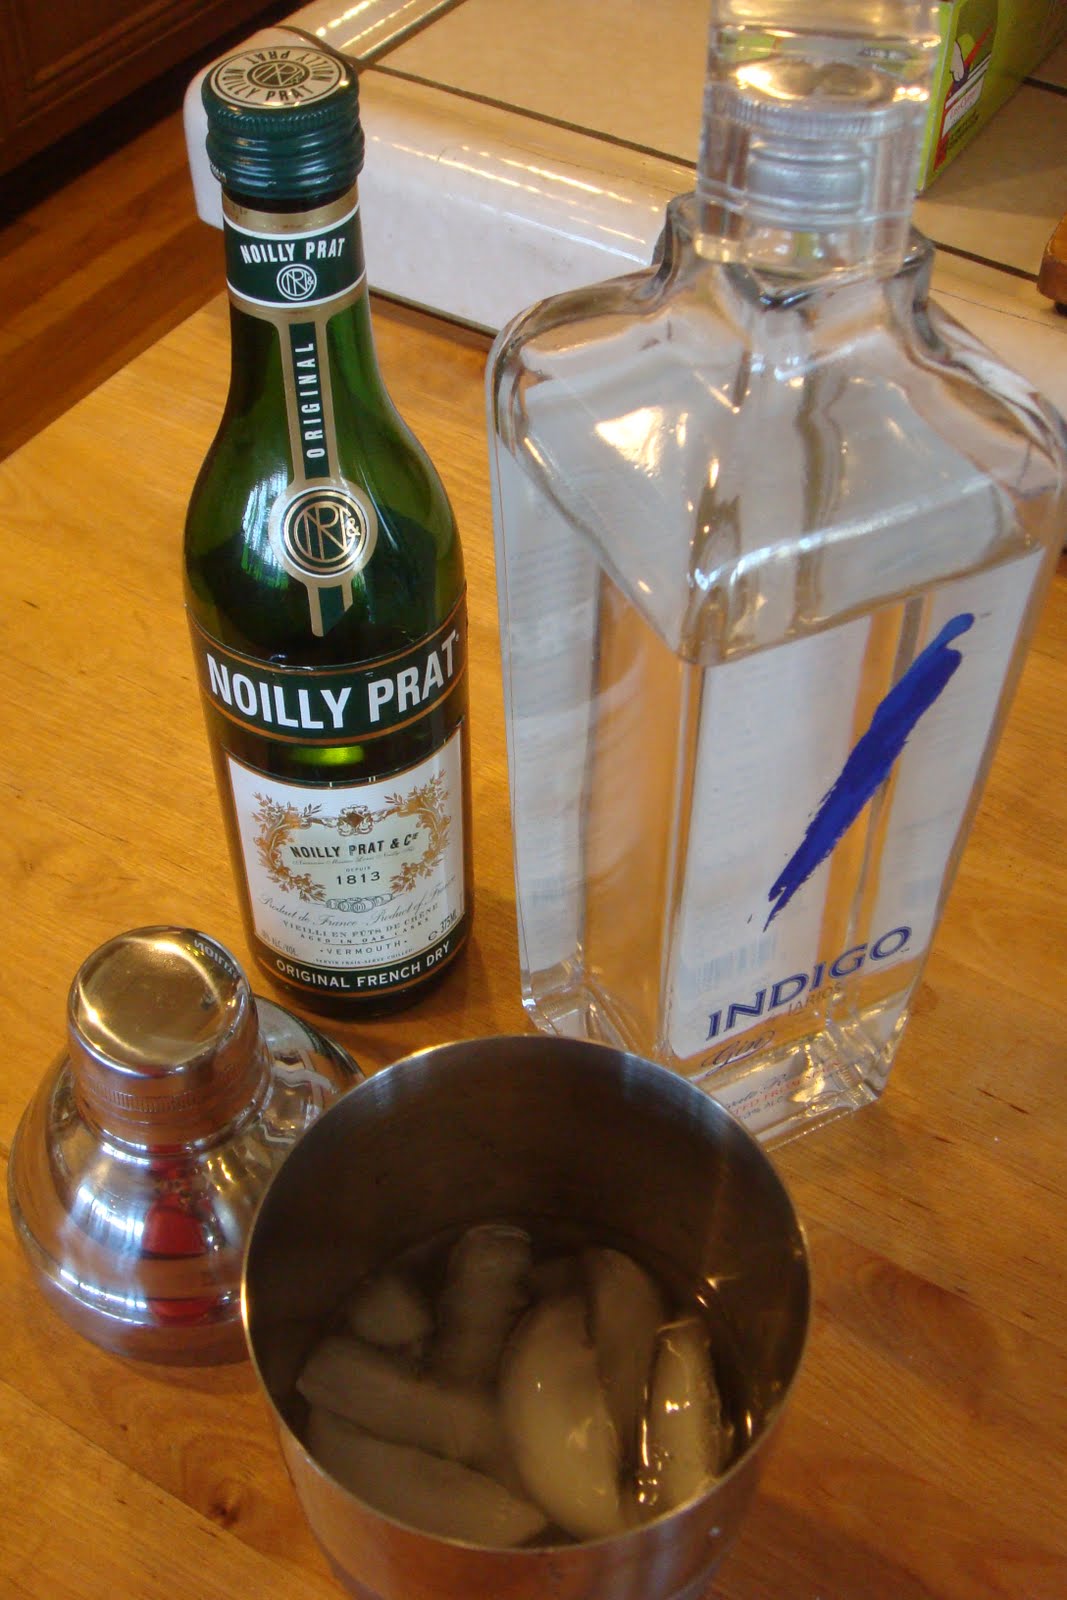 Put ice in your shaker; add gin, just a wee-tad of vermouth, cover and shake.
Pour into your glasses, and ENJOY.

One caveat - the first time I used a martini shaker, I had a little incident. The shaker consists of 3 parts - the cup, the strainer, and the lid. You put the strainer on the cup, then the lid on the strainer, to shake. You remove the lid to pour through the strainer (pouring the iced-gin into the glass, sans the ice). The first time I tried this (years ago), I neglected to hold onto the strainer portion, and it came off - smashing into my martini glass - shattering the glass and pouring a delicious martini all over the counter. Needless to say - I only had to learn that lesson once!

Sunday, July 24, 2011
Pioneer Day Breakfast Squishee
 It seems like just last year we were celebrating Pioneer Day - doesn't it? And this year, we're not REALLY celebrating Pioneer Day on the 24th because it falls on a Sunday, and the Pioneers would NEVER celebrate on a Sunday (so they had their parade and shot off the fireworks yesterday - lame!) In keeping with the "Sabbath is a day of rest" philosophy of those Pioneers, today's breakfast suggestion is very minimal on preparation and effort.
I'd like to introduce you to the "Breakfast Squishee" - a much funner way to say "smoothie." The ingredients are simple - yogurt, orange juice, ice, and a variety of whatever fruit you have sitting around - often at that stage where "if you don't do something with this fruit soon, you'd better throw it out." I used strawberries, peaches and a banana.

 Clean and chop your fruits - big chunks are just fine.
Put the chunks into your blender, along with the yogurt and orange juice.

I like to put one fruit in first, then the yogurt, then the rest of the fruits and then pour in a half cup or so of orange juice. It trickles through the fruit to hit the bottom of the blender and gives a good start to the puree process.


Secure the lid on the blender, and puree until the mixture is smooth and all the fruit has been fully SQUISHED! Then, add a cup full of ice, and puree that into the mixture, to give it an "icee" texture.

Pour into glasses, and enjoy. In order to balance out our breakfast, I cooked up some pork sausages - because what's breakfast without pork?!!
Monday, July 11, 2011
Bea's Welcome Home Pasta
 Brian just had hip replacement surgery, and after just 2 nights in the hospital, he was ready to leave the hospital food and come back to my home cookin' I gave him a choice (like they did in the hospital) and he chose simple Pasta, in garlic oil, tossed with fresh tomatoes, garden-grown basil, and mozzarella.
Before you boil your pasta, prepare the other ingredients. I used Roma Tomatoes - from the grocery store, and Basil - picked fresh from the patio garden.

Slice the tomatoes into quarters, and remove the seeds and guts - you'll end up with just the
 tomato meat - without the unnecessary juice. Chop the basil. Set aside till the pasta is done.
Now cook that pasta - and we've covered this before, so there are no pictures.
Drain the cooked pasta; set aside; wipe dry the pasta pot and return it to the burner. Add a pat of butter and a couple tablespoons of olive oil and heat. Add 5 -6 cloves of chopped garlic, and I
  also added a teaspoon of
 pat of butter and a couple tablespoons of olive oil and heat. Add 5 -6 cloves of chopped garlic, and I
  also added a teaspoon of
"Trader Joe's Everyday Seasoning" - a combination of sea salt, mustard seed, black peppercorn, coriander, onion, garlic, paprika and chili pepper - all in a mini grinder so it's fresh ground when you dispense it.

After sautéing the garlic and seasonings, stir the pasta back into the pot, coating all the pasta with the garlic/oil sauce, but careful not to tear the pasta.
At this point, I continued the preparation in individual bowls. I knew I had much more pasta than we would consume in one sitting, and I wanted to keep the uneaten pasta “extra ingredient free” for later use.


After sautéing the garlic and seasonings, stir the pasta back into the pot, coating all the pasta with the garlic/oil sauce, but careful not to tear the pasta.
At this point, I continued the preparation in individual bowls. I knew I had much more pasta than we would consume in one sitting, and I wanted to keep the uneaten pasta “extra ingredient
 free” for later use.

I layered the pasta, shredded mozzarella, more pasta, and then topped with the fresh tomatoes and basil. VOILA! It was simple, light and delicious.
 And as for that left over pasta? I served it the next day for lunch, cold, topped with chunks of a left over rotisserie chicken. It was delicious all over again!
 Monday, July 4, 2011
Feta Stuffed Peppers
 Happy Birthday America! We were unable to host our usual 4th of July BBQ on the roof, due to roof repairs. Luckily, Joerg and Rob volunteered (well, I coerced them) to have a BBQ at their place. I had run across a recipe in "Saveur" magazine that I wanted to try, so I did, and voila.... "Piperies Gemistes Me Feta" - or Feta stuffed peppers. The recipe called for "10 Fresno chilies or 6 Anaheim chilies" - but I went with what I could find at Trader Joe's.
Here's what you need: (although I had twice the amount of filling when all was said and done)
10 petite red and orange bell peppers

5 Jalapeno peppers
18 oz. feta, crumbled
4 Tbsp. extra virgin olive oil
4 Tbsp. Greek yogurt
2 tsp. minced fresh parsley
1 tsp. lemon zest
1/2 tsp. dried oregano
3 egg yolks

salt and pepper to taste
1/2 cup grated Parmesan cheese
 Arrange a rack six inches from the broiler element of your oven; put the peppers on a baking sheet and broil until just soft, about 6 minutes. Turn once during the broiling. Remove and set aside to cool. (at this point, your kitchen will smell wonderful!)
 Meanwhile, in a bowl mix the feta, oil, yogurt, parsley, zest, oregano, and egg yolks, with salt and pepper to taste. If you have a hand mixer, use that. I used a whisk, and an egg masher, to really mash up the chunks of feta.
 Slice the cooled peppers in half, scoop out the seeds and trim the "ribs." Spread the feta mix into each pepper, transfer back to the sheet that you broiled the peppers on, and place in the fridge for 30 minutes (I put them in the fridge overnight, and that worked just fine for me and my schedule).
 Sprinkle the peppers with grated Parmesan cheese, and place under the broiler until the cheese is melted, brown and bubbly, about 6 minutes.
 The recipe I used suggested transferring the peppers to a platter and serving warm - but since we were attending a party later in the day, I served them at room temperature. They were delicious both ways, but I think that hot is better.
Sunday, June 19, 2011
Tuna Helper for the Lazy Cook - Dad's Favorite?
 That's right, Tuna Helper, and why not?. Here's how this came about. We had just returned home from our trip to Hawaii (See November 2010 related post) and being tired and hungry, I didn't want to fuss with anything too difficult or time consuming to make. I also had to deal with what was in the pantry - as I hadn't been to the store for nearly two weeks (except a quick run to Trader Joe's for fresh salad fixings).
This is why you should have something standard like Tuna Helper and canned tuna fish in your pantry. I realize this post is eerily similar to my "Spaghetti in a Box" post from a year and a half ago - but I wanted to give you a new option, and cover my bases for those readers who don't want to access the archive index.
 Here's what you need:
1 Box Tuna Helper
 And how does one make Tuna Helper? Duh - follow the instructions on the back of the box.
2 Cans Tuna Fish Milk, Water and Butter (all according to box directions)
 And how does one make Tuna Helper? Duh - follow the instructions on the back of the box.
I need not repeat the directions here, but I will tell you that at the same time that I added the canned and drained tuna fish, I added a can of chopped mushrooms stems and caps (also drained).
 You basically melt the butter in the water and milk with the seasoning package, then stir in the noodles and tuna (and optional mushrooms), bring to a boil, reduce heat, cover and simmer until done.
 The sauce will thicken as it simmers, and then it thickens even more after you take it off the heat and let it sit.
To compensate for the additives and preservatives that are in pre-packaged food, I suggest that you serve a simple, healthy side salad with your bowl of yummy and delicious Tuna Casserole.


Sunday, June 5, 2011
Bag-O-Salad with Steak
 Not every meal needs to be loaded with cheese and cream and butter and such.... and not every meal has to be time-consuming or even complicated to prepare. When you're in the mood for a light dinner, and your Thursday night line-up on television is going to start in 5 minutes, why not just have a simple salad, out of the bag, but liven it up with that left-over steak you have from the Memorial Day barbecue? And you might as well use that left-over half of the green pepper from your strata. In other words, use leftovers to liven up a simple salad.
 I found the following in my fridge:
Bagged salad
Green Pepper - chopped
Black Olives - sliced
Parmesan Cheese - grated
Steak - sliced into bite size chunks
Bottled Salad Dressing
 Put salad in serving bowls - as much or as little as you'd like.
Sprinkle over the salad sliced olives, chopped green pepper and grated parmesan.
Next, top with steak bites and drizzle on the dressing.
 VOILA - simple as that - and oh-so-tasty.
 I served a side of garlic toast. I like to slice the french bread and lightly toast it in the toaster.
Spread butter over each slice, and sprinkle with garlic poweder with parsley. Bake in the oven for a few minutes to melt the garlic powder into the buttered toast.
Sunday, May 29, 2011
Simply Strata
 It's Memorial Day weekend, known to us "old folks" as Decoration Day weekend. You gather with the family, go to Grandma's house, cut fresh flowers, then go to the cemetery to decorate the graves of all our dearly departed, whether they died in a war or some other way. It's been a family tradition for us, and who has time to cook? That's why a Strata comes in handy - it's easy to put together the night before for a quick cook in the morning, and can be served before your Memorial Day activities for energy to decorate graves, go to a barbecue, see an art museum exhibit, or whatever else might be on your agenda.
Here's all you need:
1 lb pork sausage

6 slices of bread - french or sourdough - cubed
6 ounces fresh mushrooms, sauteed
1/2 cup chopped green pepper
2 cups cheese - I like a combination of sharp Cheddar and Swiss
7 eggs
2 cups buttermilk (most recipes call for just "milk," but I had left-over buttermilk, and the Internet gods told me that buttermilk was just fine for Strata).
1 teaspoon salt
1 teaspoon ground dry mustard
1/2 teaspoon ground pepper

1/2 teaspoon onion powder
1/2 teaspoon ground cayenne pepper
Saute the mushrooms in butter in a large skillet - put aside.
 Cook the sausage in the same skillet until evenly browned - drain and put aside.
 Lightly spray a 9 x 13 inch baking pan with Pam cooking spray, and layer one half of the bread cubes, cooked sausage, sauteed mushrooms, chopped green peppers and combination of cheese. Repeat layering with the other half of all those delicious ingredients.

 In a bowl, whisk together the eggs, buttermilk, and seasonings; then pour the egg mixture over the bread cube mixture.
Cover, and refrigerate at least 12 hours, but preferably overnight...(if the 12 hours isn't overnight, that's some party and why wasn't I invited?)
Next morning, 30 minutes before you're going to cook it, take the egg casserole out of the refridgerator and preheat your oven to 350 degrees, then enjoy a cup of coffee and/or a bloody mary while the oven heats.
 Bake covered for 40 minutes, then remove cover and bake for an additional 15 to 20 minutes or until top is evenly browned, and a toothpick inserted into the center comes out clean. Let stand 10 - 15 minutes before cutting and serving.

ENJOY with a bowl of fruit - nectarine, peach, orange and banana, with a splash of orange juice and triple sec.
Subscribe to:
Posts (Atom)