Sunday, December 27, 2009

Josh's 1-hour Homemade Pizza


This week's post features a "Guest Food Artist," something I hope to do periodically so that I don't have to do all the cooking. Josh is our Wednesday bartender at the Motherlode, and an incredible photographer. Check out his web page at: http://www.rominephoto.com/


AND he's a budding chef, specializing in Pizza. I think that I make a mean pizza, but Josh claims that I don't really "make" pizza, because I use the bag-o-dough from Trader Joe's, instead of making my own pizza crust. So to show off, Josh sent me this recipe, which I share with all of you (all 14 of you) with Josh's permission.

And Josh is really cute, so you know he has to make good pizza! Here's the recipe, in Josh's own words:

"hey scott, the other night i wanted a quick pizza. I went from starting completely from scratch, to pulling a hot pizza out of my oven in an hour. i thought i'd share it with you and that you might want to put it up on your blog :)first thing is first. everything in this recipe can be taken to a new level. i'm really going to focus on using ingredients that you can keep stored so that at any moment you can make a quick pizza. using fresh ingredients is always recommended, but for the sake of ease and ability to just have these ingredient laying around, i'm going to focus on that.-Preheat your oven. Before you even start putting together your ingredients, you'll want your oven to be as hot as you can get it. It takes a good 45min to an hour for my oven to get completely heated up, so turn it all the way up as high as it will go before you get started (basically just turn the oven up as high as it will go. mine goes up to 500 and i just turn it up all the way. pizza ovens in restaurants get even higher.)
Pizza Dough:
-3 1/2 cups flour
-1 cup warm water
-2 tbl honey
-1 tbl quick rise yeast
-1/4 c olive oil
-1/2 tea salt
I know that with quick rise yeast you don't have to proof it, but i do anyways. Dissolve the honey in the warm water and mix in your yeast. Let it sit for 10-15 min. While your yeast is proofing, put together the rest of your ingredients into a bowl. Make sure that when you measure out your flour, you don't compact it into the measuring cup. I always spoon my flour out into my measuring cup. Once your yeast has been proofed, pour it into the bowl and mix everything together. If you have a mixer with a dough attachment, use that. If not, knead your dough until it's stretchy but not sticky. If your dough is sticky, add a tiny amount of flour while you knead. If it's too dry, add a tiny amount of water. Shape it into a ball, cover and let rise for 30 min.While your waiting for your dough to rise, let's make the sauce. It's a no-cook sauce, and It's easier than you think!!

Pizza Sauce:
-1 20oz can San Marzano tomatoes
-1 tea minced garlic
-1-2 tbl dry basil
-1 tea dry oregano
-1 tea honey
-1 tbl olive oil
The most important ingredient in the entire pizza are the San Marzano tomatoes. I can not stress enough how important they are. They will embody your sauce and your pizza with a flavor that is completely unique. I take all my ingredients, put them in a bowl, and use a potato masher to mix it all up. I like my sauce to be a bit chunky, but you can easily blend this mixture as well for a smooth sauce. You can also add any other spice or herb to this sauce to give it a flavor all your own. I will often add crushed red peppers to mine to give it a little spice. Once your sauce is the consistency you like, cover and put in the fridge. After your dough has risen for 30min, punch down and separate into balls. I usually separate mine into 3 dough balls, but it really depends on how large you want each pizza to be. Cover and let rise for another 20 minutes.After 20 minutes, it's time to make your pizza.
For a wonderful and easy technique on how to form your pizza, I highly recommended watching this video: http://www.youtube.com/watch?v=SjYqw1CLZsA. You don't need to be a pro or throw your pizza up in the air in order to make a thin and perfectly balanced pizza crust. Watch this video, it will take your pizza making to a new level.
I use the push dough technique for mine because I like a good size crust. There are many different ways to make and cook your pizza. I use pizza stones, but you can use a pan, cast iron skillets, whatever you have.The basics are pretty much the same for every type of cooking technique. Push out or roll your pizza dough, transfer it to your cooking device (pan, skillet, pizza peel), put on your sauce, put on your toppings, and put it into the oven. I always put a little corn meal on my pizza peel or skillet before putting the dough in to my cooking device so it doesn't stick. You can also drizzle olive oil around your dough before putting it into the oven. They key to making a great pizza: less is more. Piling on cheese and toppings may sound like a great idea, but in the end it will only make your pizza heavy and unbalanced. With homemade pizza, a little goes a long way. Experiment with different toppings and combinations. For me, the sauce and crust are so good that I usually don't put any additional toppings on my pizza.

Once your pizza goes into the oven, you'll want to keep an eye on it. It should cook in 5-10 minutes. On a pizza stone, my pizza's cooks in 5 minutes, and if I don't watch it closely, it's very easy to burn. Most importantly, experiment and have fun!! Don't get discouraged if you overcook your pizza or if the dough doesn't quite fluff up. Every time I make pizza it comes out differently. The bottom line is that no matter what, your homemade pizza will be head and shoulders above anything you'll get from delivery."
THANKS JOSH! Now, give it a try and post your comments on Josh's Pizza. If you want to cheat, get a bag of Trader Joe's pizza dough - but don't expect the same deliciousness as you'd get if you made your own dough.

Sunday, December 20, 2009

Chili Verde Enchiladas

I hope that you froze the left overs from the chile verde recipe that we made last week. If not, you'll have to make more, if you did, here's one of my favorite things to do with pork left overs - ENCHILADAS - they're easy, fast, and delicious. And you can make them early in the day, put in the fridge, and bake just before you're ready for din-din.

The day before you're going to create this taste sensation, thaw your left over chili verde in the refridgerator overnight.


Dump it in a large mixing bowl.


Chop two small (or one large) onions, 1/2 can of black olives, and a healthy scoop of pickeled sliced jalapaenos.

Add these to the mixing bowl, then add a plentiful amount of shredded Monterey Jack cheese and a scoop of shredded medium or sharp cheddar (the more cheese you add, the yummier your enchiladas will be, but if you're going to go all health conscious on me, then use less cheese).

Now mix it all together - this will be the stuffing for your soon-to-be-yummy enchiladas.

Now prepare your assembly line. Flour tortillas, bowl of enchilada filling, and baking dish - sprayed lightly with PAM to ease in getting the enchiladas out after cooking. Scoop the desired amound of filling onto the tortilla, roll up, and place in the baking dish. Repeat until the baking dish is full. (Note, I even put one on the side going a different directions to use up all of the space.)


Top with a 7 ounce can of Herdez chili verde salsa, spread some cheese, and bake at 375 degrees, covered with foil, for 50 minutes.

Remove foil and bake an additional 10 minutes. Let rest for 5 minutes (use this time to prepare your salad) and ENJOY.

Tuesday, December 15, 2009

Chili Verde Pork Roast Loins

When you're craving chili verde, but don't want to wait for a table at El Compadre, why not make your own at home. Please note, the preparation and cooking time is slightly longer than the wait you'll experience at El Compadre on a weekend night. If you want to eat around 7pm, you'd better start this dish by 11am. Here is my take on chili verde pork roast loins.... SLO-Cooked in my favorite dutch oven.

You'll need two pork roast loins, about 2 pounds each - I got mine from Costco in a 4-pack (freeze the other two); 2 medium onions, a shallot (because that's what I had left over from another recipe and I wanted to use it), several cloves of garlic, one 7 ounce can of chili verde sauce/salsa (in a can or jar - the brand of verde sauce that I like to use is "Herdez Salsa Verde" in a can) and a 7 ounce can of whole green chili peppers (if you have the chopped ones, that will work just fine, I just happened to have a can of whole chili peppers in my pantry, so that's what I used). Also, you'll need to make a rub for the roasts. I used about 1/2 tablespoon each of coriander, cumin, cumin seed, ground cayenne pepper, salt, pepper and granulated garlic.

Preheat your oven to 475 degrees.

Wash and pat dry your pig, set on a plate.
Mix the dry seasonings in a small bowl, and place next to the pig chunks. Rub the pork loins on all sides with the seasoning mix.


Chop the onion, shallot and garlic.
(I chopped the green chili peppers, too)

Set your dutch oven over medim heat, add olive oil, and saute the onions, shallot and garlic
until they are a light brown

Now add the can of chili verde salsa and the chopped green chilies (canned or hand chopped, depending on what's in your pantry). Stir thoroughly and remove from the burner (I presume you're using a gas stove top).


Lovingly nestle the season-crusted loins into your dutch oven, resting on top of the salsa onion mix, cover and put in your preheated oven. Set the timer for 20 minutes, and when it beeps at you, reduce the heat to 225.


Now ignore your dish, as hard as
that may be, for 7 hours. Run some errands, read a book, go meet friends for a cocktail.


Remove from the oven, and take a pretty picture - then let it rest with the lid off for 10 to 15 minutes.


Using a fork, gently tear the pork loin apart and mix with the delicious goodness of the chili verde sauce its been cooking in.

Warm flour tortillas in your convection oven (or your real oven if you are not so environmentally conscientious) - spread on a layer of shredded lettuce, then scoop on the chili verde goodness, roll and enjoy..... YUMMY.


If you have leftovers (and if you don't, then you are eating too much, PIGGY, PIGGY, PIGGY) freeze or refrigerate, depending on when you will finish it off. Next week, I'll post what you can do with the leftovers.

Wednesday, December 9, 2009

Ask Gourmet Gibbs

Oh, I just had a question from my dear niece, Becky. She is a big wig assistant coach at Idaho State, coaching the women's soccer team. Here's her question:


"Dear Gourmet Gibbs: I've been obsessing about how to cook an artichoke for a good long while. While discussing with Ben we stumbled upon the memory of you serving artichokes at a function while you were living in SLC. Please advise...."

Dear Artichoke Impaired:

Pick fresh artichokes - the more that little sticker on the end of the leaves pokes you and makes you say "ouch" - the fresher the choke. Rinse the chokes under water. Chop off the bottom, leaving a good inch or so from the end to the leaves - it will become part of the yummy heart that you'll eat last.

With kitchen shears, cut off the top end of the leaves - this will not only get rid of the nasty sticky pointy hurty thing, but it also makes the choke prettier. Use a knife to cut off the top of the choke.

Place your choke(s) so they're standing up either in a glass/microwave safe bowl or plate with a lip. Drizzle a little lemon juice around the top and down between the leaves. Then drizzle a little water down the top and the leaves. Cover completely with plastic wrap.

Cook in the microwave. The plastic will poof up really fun - don't be afraid of it. Start with 5 or six minutes. Then remove and let sit for a few minutes. Test a leaf- it's probably not done yet. Your test leaf should be from the second or third row from the bottom and should pull out fairly easily when the artichoke is cooked - but you don't want to overcook either - you'll get mushy artichokes.

If the leaf is tough to pull - resecure the plastic wrap and cook for a few more minutes. Repeat this process until the choke is cooked. Remember, it will continue to cook for a little bit while it is resting.

Serve with melted butter. An alternative that Ms. Suzuki introduced us to is mayo mixed with soy sauce. When you get down to the needly part - use a spoon to scoop that away and discard - it's not to be eaten, then enjoy the delicious heart soaked in butter.

Side note - your Uncle Brian cleans the prickly hairs off the heart before cooking, and he chops the stem up and stuffs them in the center. I don't know how to really do this, and he's not here to advise - so I'm just giving you my version.

Good luck, enjoy, and thanks for asking Gourmet Gibbs his advice.

Monday, December 7, 2009

Holiday Appetizers - Trailer Trashy

Today is the Tavern Guild Bowling League Holiday Potluck. Every December, before we end the first half of the season, and again at the end of the winter season and the summer season, we have a pot luck at the bowling alley - nothing like greasy fingers to go with the oily lanes. The League furnishes a honey baked ham, plates, utensils and napkins, and all the bowlers are to bring a favorite dish to share.

As this IS a BOWLING league, I have discovered the perfect pot luck bring-along -


"Little Weenies Wrapped in Blankets."


It doesn't get much more trailer trash than this - and everyone LOVES them.


For these bites of deliciousness, you'll need 4 cans of Pillsbury Crescent Rolls and a large 32 ounce package of Hillshire Farm Lit'l Smokies Smoked Sausages. Store brand pop and bake crescent rolls do NOT work as well - I've tried them to my disappointment, and now I only use Pillsbury brand - buy the 4-pack at Costco or Smart and Final - it's a big savings over the grocery store.


Preheat the oven to 375 degrees. On a large cutting board, roll out and separate the crescent rolls. With a sharp knife cut each of the dough triangles into three smaller triangles, as evenly as possible.


Place a little weenie on the roll, and wrap it up good.


Transfer to a large baking tray - not greased - repeat until there are no little weenies left in the package. If you have excess 1/3 triangle crescent rolls , just roll them up with nothing inside - they can be a treat for your vegetarian friends (although I don't think we have any of those on our bowling league.)


Bake for 11 to 13 minutes. At least that's what the package directs, but I have found you need to watch them, and bake for closer to 13 - 15 minutes. You want the rolls to be flaky and light brown - be careful not to over bake as this will dry out the blanket surrounding your little weenie.

When the little wrapped weenies are out of the oven, let cool for a couple minutes on the baking sheet, then remove to a cooling rack for additional cooling.


After 5 minutes or so, arrange the little wrapped weenies in a serving basket of your choice.


I like to use this pretty wicker basket, lined with a napkin (I used to use foil, but I'm trying to reduce my carbon footprint so this year I'm using a cloth napkin).

People may mock you for the "simplicity" of this dish - but trust me, there won't be one little weenie in a blanket that doesn't get snarfed up at your pot luck.

Saturday, December 5, 2009

Holiday Appetizers - Trendy

Today's post features an appetizer that is quick and easy for the holidays. Oh, and it's tasty too. This little treat is from the "trendy" category - Bacon Wrapped Chestnuts - perfect for serving your guests at the "Tree Trimming Party" - you fix the food and pour the cocktails, your guests decorate your tree.

You'll need three cans of whole water chestnuts, soy sauce, brown sugar, and 1 pound of sliced bacon (don't get the ingredients confused - you'll be sorry if you pick up sliced water chestnuts and a pound of slab bacon - it won't work).

Open and drain the water chestnuts. In a bowl large enough to hold the water chestnuts, pour in a good amount of soy sauce, and two tablespoons of brown sugar -stir until the sugar is dissolved in the soy
sauce. Put the water chestnuts in the mixture, and add enough soy sauce to cover the chestnuts. Let those soak up the deliciousness of the sugary soy sauce for at least 4 to 6 hours - stirring whenever you happen to walk by the bowl.


Before the guests arrive, preheat your oven to 425 degrees, then slice the package of bacon in thirds - for whatever reason, this just happens to work out to one short slice of bacon per each water chestnut - give or take.

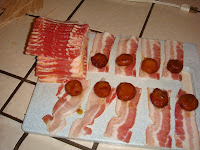
Place a water chestnut on a slice of bacon,
roll it up, and secure with a toothpick.

Place the wrapped water chestnut in your baking dish. I like to use my favorite Nacho baking dish, which I line with aluminum foil for easy cleanup. Repeat until all the chestnuts are wrapped.

If you have vegetarian guests (and who doesn't these days) just stab a toothpick into a few of the soaked chestnuts, and prepare a little separate foil tray so the bacon goodness doesn't taint the holy vegetarian chestnuts.


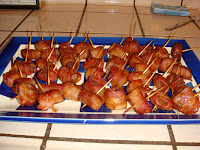
Put the baking dish in the oven, and cook until the bacon is crispy. I recommend turning the wrapped chestnuts once or twice for even bacon cooking. When done, arrange the tasty treats on a serving platter, preferably one created by San Francisco artist Clark Sorensen, and watch your guest devour them all, as they trim your holiday tree.


Thanks guys!


Don't worry about cleaning up the baking pan just yet - simply hide it in your microwave, and the bacon fat will cool and set up, making for easy clean up later. Just don't turn on the microwave with all that foil in it.