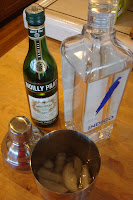
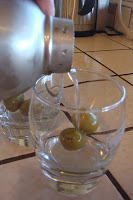
 Irrelevant blabber: On one of my gymnastics blogs that I follow, I use a profile that lists my name as "Hava Martini" - it's kind of like a drag name - you know, like "Orna Mint," "Della Catesson," "Candie Wrapper," "Anita Cocktail,"and such. Well, today, instead of a happy hour bloody mary, we decided it was a good time to enjoy a martini - as in just "Hava Martini!"
Sunday, July 24, 2011
Pioneer Day Breakfast Squishee
 It seems like just last year we were celebrating Pioneer Day - doesn't it? And this year, we're not REALLY celebrating Pioneer Day on the 24th because it falls on a Sunday, and the Pioneers would NEVER celebrate on a Sunday (so they had their parade and shot off the fireworks yesterday - lame!) In keeping with the "Sabbath is a day of rest" philosophy of those Pioneers, today's breakfast suggestion is very minimal on preparation and effort.
I'd like to introduce you to the "Breakfast Squishee" - a much funner way to say "smoothie." The ingredients are simple - yogurt, orange juice, ice, and a variety of whatever fruit you have sitting around - often at that stage where "if you don't do something with this fruit soon, you'd better throw it out." I used strawberries, peaches and a banana.

 Clean and chop your fruits - big chunks are just fine.
Put the chunks into your blender, along with the yogurt and orange juice.

I like to put one fruit in first, then the yogurt, then the rest of the fruits and then pour in a half cup or so of orange juice. It trickles through the fruit to hit the bottom of the blender and gives a good start to the puree process.


Secure the lid on the blender, and puree until the mixture is smooth and all the fruit has been fully SQUISHED! Then, add a cup full of ice, and puree that into the mixture, to give it an "icee" texture.

Pour into glasses, and enjoy. In order to balance out our breakfast, I cooked up some pork sausages - because what's breakfast without pork?!!
Monday, July 11, 2011
Bea's Welcome Home Pasta
 Brian just had hip replacement surgery, and after just 2 nights in the hospital, he was ready to leave the hospital food and come back to my home cookin' I gave him a choice (like they did in the hospital) and he chose simple Pasta, in garlic oil, tossed with fresh tomatoes, garden-grown basil, and mozzarella.
Before you boil your pasta, prepare the other ingredients. I used Roma Tomatoes - from the grocery store, and Basil - picked fresh from the patio garden.

Slice the tomatoes into quarters, and remove the seeds and guts - you'll end up with just the
 tomato meat - without the unnecessary juice. Chop the basil. Set aside till the pasta is done.
Now cook that pasta - and we've covered this before, so there are no pictures.
Drain the cooked pasta; set aside; wipe dry the pasta pot and return it to the burner. Add a pat of butter and a couple tablespoons of olive oil and heat. Add 5 -6 cloves of chopped garlic, and I
  also added a teaspoon of
 pat of butter and a couple tablespoons of olive oil and heat. Add 5 -6 cloves of chopped garlic, and I
  also added a teaspoon of
"Trader Joe's Everyday Seasoning" - a combination of sea salt, mustard seed, black peppercorn, coriander, onion, garlic, paprika and chili pepper - all in a mini grinder so it's fresh ground when you dispense it.

After sautéing the garlic and seasonings, stir the pasta back into the pot, coating all the pasta with the garlic/oil sauce, but careful not to tear the pasta.
At this point, I continued the preparation in individual bowls. I knew I had much more pasta than we would consume in one sitting, and I wanted to keep the uneaten pasta “extra ingredient free” for later use.


After sautéing the garlic and seasonings, stir the pasta back into the pot, coating all the pasta with the garlic/oil sauce, but careful not to tear the pasta.
At this point, I continued the preparation in individual bowls. I knew I had much more pasta than we would consume in one sitting, and I wanted to keep the uneaten pasta “extra ingredient
 free” for later use.

I layered the pasta, shredded mozzarella, more pasta, and then topped with the fresh tomatoes and basil. VOILA! It was simple, light and delicious.
Monday, July 4, 2011
Feta Stuffed Peppers
 Happy Birthday America! We were unable to host our usual 4th of July BBQ on the roof, due to roof repairs. Luckily, Joerg and Rob volunteered (well, I coerced them) to have a BBQ at their place. I had run across a recipe in "Saveur" magazine that I wanted to try, so I did, and voila.... "Piperies Gemistes Me Feta" - or Feta stuffed peppers. The recipe called for "10 Fresno chilies or 6 Anaheim chilies" - but I went with what I could find at Trader Joe's.
Here's what you need: (although I had twice the amount of filling when all was said and done)
10 petite red and orange bell peppers

5 Jalapeno peppers
18 oz. feta, crumbled
4 Tbsp. extra virgin olive oil
4 Tbsp. Greek yogurt
2 tsp. minced fresh parsley
1 tsp. lemon zest
1/2 tsp. dried oregano
3 egg yolks

salt and pepper to taste
1/2 cup grated Parmesan cheese
 Arrange a rack six inches from the broiler element of your oven; put the peppers on a baking sheet and broil until just soft, about 6 minutes. Turn once during the broiling. Remove and set aside to cool. (at this point, your kitchen will smell wonderful!)
 Meanwhile, in a bowl mix the feta, oil, yogurt, parsley, zest, oregano, and egg yolks, with salt and pepper to taste. If you have a hand mixer, use that. I used a whisk, and an egg masher, to really mash up the chunks of feta.
 Slice the cooled peppers in half, scoop out the seeds and trim the "ribs." Spread the feta mix into each pepper, transfer back to the sheet that you broiled the peppers on, and place in the fridge for 30 minutes (I put them in the fridge overnight, and that worked just fine for me and my schedule).
 Sprinkle the peppers with grated Parmesan cheese, and place under the broiler until the cheese is melted, brown and bubbly, about 6 minutes.
 The recipe I used suggested transferring the peppers to a platter and serving warm - but since we were attending a party later in the day, I served them at room temperature. They were delicious both ways, but I think that hot is better.
Subscribe to:
Posts (Atom)


