Sunday, October 16, 2011

Goat Cheese Pizza

We haven't done Pizza in quite some time, so even though the Pizza process is the same as prior posts, this week is a reminder that homemade (well, nearly homemade) pizza is way yummier than frozen.


It's not really home made since I always start my pizza with a bag of Trader Joe's Pizza Dough - or you can pick up a roll of pizza dough from your favorite pizzeria, or you could always make your own from scratch - just don't as ME how to do that!


Sprinkle some cornmeal on your pizza stone, plop out the dough, and let it rest - the Trader Joe's bag says 30 minutes, but I have found that if you let it rest for up to 8 hours, it rolls out thinner and is less likely to pull back into itself (there are some out there who heat the pizza stone in the oven, prepare the pizza dough and toppings on one of the flat boards, and then slide the prepared pie onto the heated stone - BUT those people aren't me).


I kept my toppings simple - sliced mushrooms, sliced red onion, and mozzerella and goat cheeses.


When you're ready to cook the pizza - preheat your oven to 500 degrees; then roll out the pizza as thin as you can get it on your pizza stone. Spread a thin layer of olive oil over the dough, then sprinkle with sliced fresh garlic.


Cook the dough for 8 - 10 minutes - until the dough is just starting to turn a golden brown. Remove from the oven - pop down any big bubbles that may have popped up, and then layer on the toppings.

Spread a thin layer of mozzerlla over the pizza, then evenly distribute the sliced mushrooms and onions, and finally, top with dollops of goat cheese.

Return to the oven and continue to cook for another 6 - 8 minutes - until the cheese is bubbly and just starting to turn golden brown. Remove and let sit for 5 minutes before slicing....


and then ENJOY.

Sunday, October 9, 2011

Chicken Broccoli Cauliflower Farfalle Casserole

We're getting back into Fall, and that means more casseroles, soups, chilis and comfort food (not that it's wrong to cook those in the middle of Summer!) This first post for October is Chicken Broccoli Faralle Casserole, and the first rule of casserole is: Look in your fridge to see what you have left over that should be eaten, but you don't want to eat it exactly as it was initially prepared. Add to that your patry staples, and you've got yourself a meal.


I found leftover rotisserie chicken, extra broccoli and cauliflower - and I had a package of Farfalle (bowtie) noodles, cream of mushroom soup, canned mushrooms and, of course, cheese.

Prepare the package of Farfalle noodles according to the package directions. While the noodles are cooking...


Chop into bite-sized pieces approximately one cup each of broccoli, cauliflower and chicken.


Drain the noodles into a strainer and set aside, then, using the same pot, toss together the broccoli, cauliflower, chicken, mushrooms - including liquid - condensed soup, salt and pepper to taste, and about 1 cup of grated cheese.

(By the way, I'm ALL about using as few pots as possible, and if you can use one for multiple uses and just wash it once - go for it!)

Put the mix in a size-appropriate oven-safe casserole dish, sprinkle with the top with a bit more cheese, cover, and cook in a PRE-HEATED oven (375 degrees) for approximately 50 - 55 minutes. Remove the cover, and cook another 10 minutes or so until the top is bubbly brown and delicious looking.

Remove from the oven, uncover, and let rest about 10 minutes before plating...

Then enjoy - and the beauty of a casserole - it's an entire meal in one bowl, accompanied by your beverage/cocktail of choice.


DELICIOUS.

Saturday, September 24, 2011

Fruit and Yogurt Breakfast

OMG - I just realized it's been nearly a MONTH since my last post. I know I've been busy, but there's really no excuse for such blog-neglect. So to ensure that I get something posted NOW, I'm going to keep it simple.


Apple

Banana

Strawberries

Yogurt


equals = BREAKFAST.


Chop/cut/slice your selected fruits.


Toss with yogurt.


Enjoy with a glass of juice and iced-coffee.


I'll try to do better the rest of the year.

Sunday, August 28, 2011

Feta Spinach Fillo Puff Triangles

Several weeks back, to celebrate the birth of our nation, I prepared "Feta Stuffed Peppers" - see July 4, 2011 post. The filling went much further than the recipe called for, so I had a bowl of left over stuffing goop to use in something else. For whatever reason, I thought - oh, this would be really good in a fillo puff pastry shell - so I went to the grocery store, bought frozen fillo dough - and semi-followed the recipe on the package.


I had NEVER used fillo dough before - and I am pleased to announce that there is nothing to fear!


Thaw the fillo dough - according to the package - overnight in the fridge, or for about an hour or so on the counter.


Refer back to the earlier recipe for the pepper filling - if you start from scratch, that will work fine - just add the spinach. If you have extra left over from your earlier pepper appetizers - just add a bit more greek-style yogurt, a bit more feta cheese, and one 10-ounce package frozen chopped spinach - thawed and squeezed dry. Mix everything together in a bowl, and get ready to assemble.


On a cutting board, spray and layer three sheets of fillo dough - placing one sheet, lightly spraying with cooking spray (also known as "Pam"), next layer - lightly spray, last layer - lightly spray. Cut the layered fillo in half lengthwise.


Place one tablespoon of the filling about 1 inch from the corner of each strip. Fold one corner of the fillo diagonally across to the opposite edge to form a triangle.


Spray lightly with Pam and continue to fold the triangle onto itself - until it's all folded up into a cute little triangle. (I don't know why this is underlined?)

My "fillo" box recipe said to spray the outside of the triangle - but I found that with all the Pam spraying already going on, there was plenty of Pam spray to produce the desired result (a golden brown color when baked).


Place triangles, seam side down on ungrease cookie sheet at least 1 inch apart. Bake in preheated oven (350 degrees) for 20 - 25 minutes - until golden brown.


We enjoyed these at the "OUTFEAST" sing-a-long showing of "Best Little Whorehouse In Texas" at the beautiful outdoor Ford Amphitheatre - with special guest, Megan!


Sunday, August 21, 2011

The 2nd 8th Annual National Grilled Cheese Invitational

This past April, we attended "The 2nd 8th Annual National Grilled Cheese Invitational" - whatever - all you need to understand is that, in addition to a grilled cheese cookoff, there were numerous restaurants that set up booths to allow you to sample their take on the "grilled cheese sandwich." And who doesn't love a Grilled Cheese Sandwich?!


Since I'm being lazy this week in my blog post, and since it's been a long while since I've taken a break from posting a recipe - I've decided to just share our experience at this incredibly delicious event! Photo intensive!


Of course we took the subway downtown, and walked to the festival site. Tillamook was an obvious sponsor, and they gave away samples of the classic grilled cheese - bread, butter and cheese!


Baby Loaf was there, as was Baby Loaf Convertible, and of course, the Tillamook Cheese Man!


It wouldn't be the Grilled Cheese Invitational with out the Grilled Cheese Truck, and its many satisfied customers.


Joey found a Breakfast Grilled Cheese - bread, butter, cheese, egg, bacon - and of course I had to help him sample it.


Another truck served the classic "School Lunch Special" - sandwich, tomato soup and fresh pressed ginger ale with sugar rimmed cup (NO - that is NOT a margerita - dammit!).


And see if you can spot "Waldo" in this photo - what happens when you enjoy TOO MANY GRILLED CHEESE sandwiches! Just a cautionary shoutout to ya'll.

Sunday, August 14, 2011

Soyaki-Asian Country Pork Ribs

Boneless Pork Ribs were on a great sale, so I bought them, and then concerned myself with how to prepare them. These are also known as "Country Style Ribs" - whether boned or boneless - I just happened to take advantage of the boneless rib sale. I ran across a recipe for "Asian Style Country Ribs" and went to Trader Joe's to get the suggested ingredients - but while perusing the aisles, I came across a marianade that covered nearly all the bases of the "raw" ingredients - SOYAKI SAUCE - so I bought that, and incorporated it into the name of this week's recipe. Do not fear - if you don't have a TJ's in your neighborhood, I've jotted down the ingredients that you'll need to create your own "Soyaki Sauce."

Ingredients (Oh so SIMPLE):


4 - 5 lbs boneless pork ribs


1 - 21 ounce jar Trader Joe's Soyaki Sauce


Or - alternatively (but I didn't try it this way)

1/4 cup lightly packed brown sugar
1 cup soy sauce

1/4 cup sesame oil

2 tablespoons olive oil

2 tablespoons rice vinegar

2 tablespoons lime juice

2 tablespoons minced garlic

2 tablespoons minced fresh ginger
1 teaspoon Sriacha hot pepper sauce
(now see, doesn't it seem simpler to just go to Trader Joe's and buy the Soyaki Sauce?)

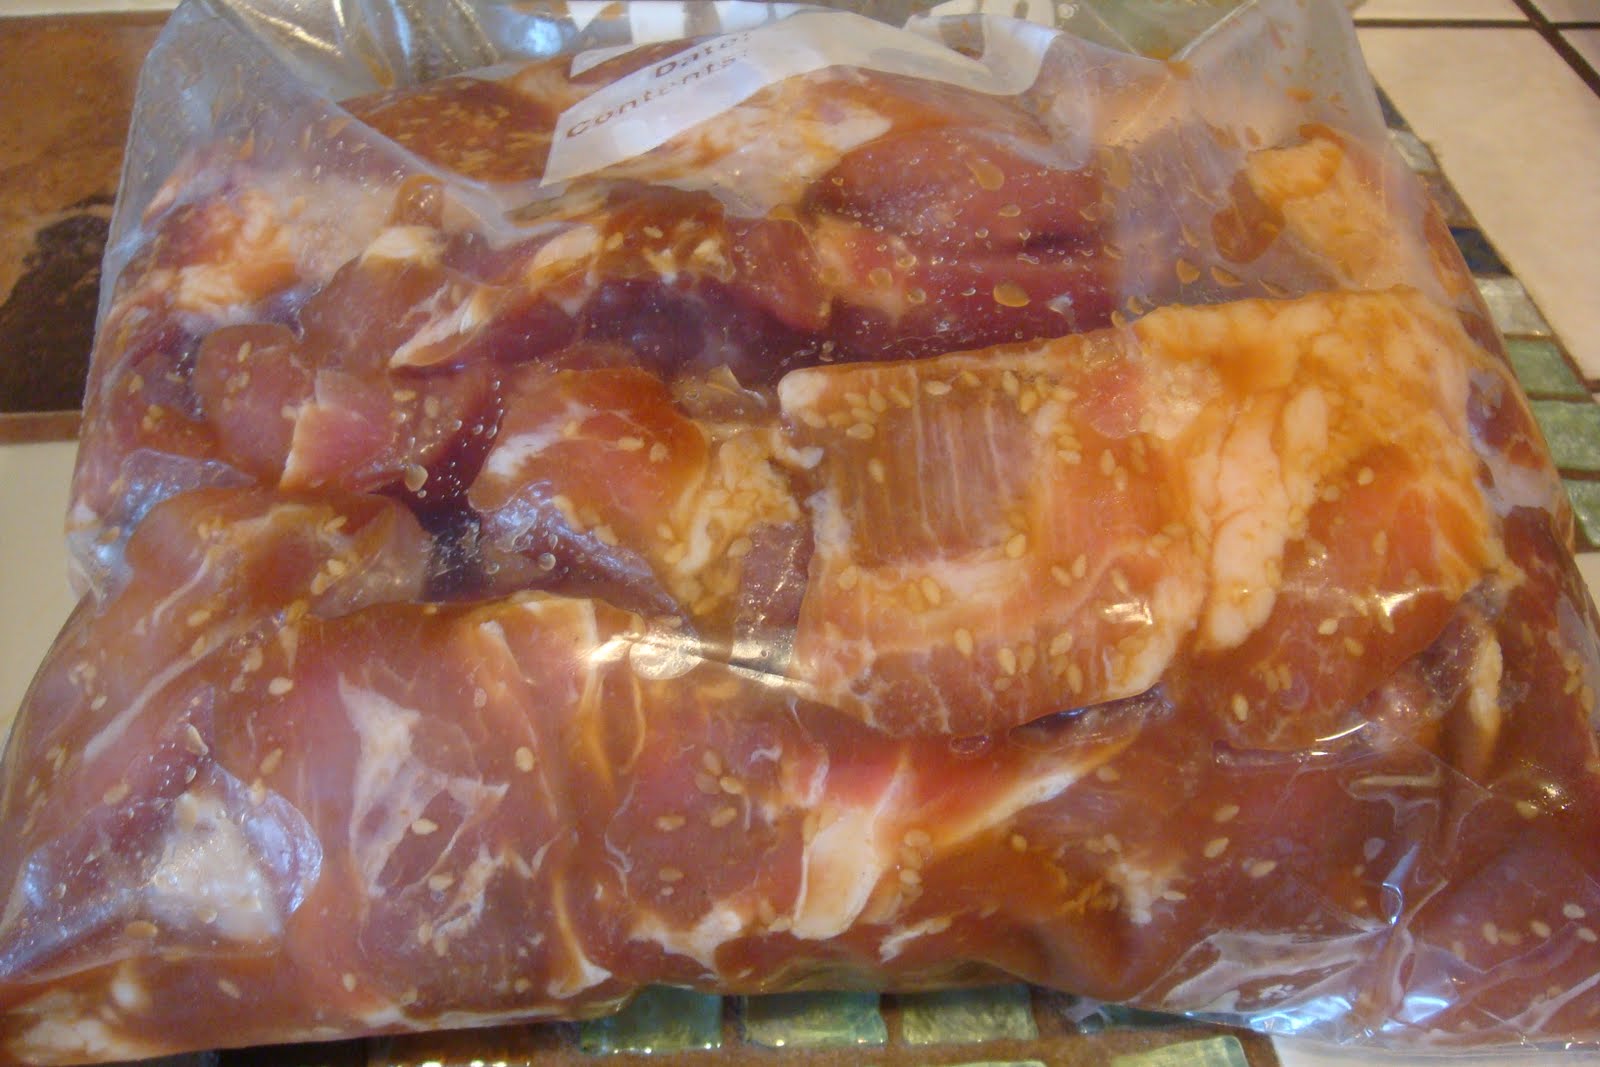
Rinse and dry the pork ribs - put in a big Ziploc Bag - with a tight seal! Pour in about 1/4 of the Soyaki Sauce - just enough to cover the ribs with a thin layer. If you're using the "do-it-yourself-sauce" - the portion necessary to coat the ribs. Zip up the bag, and marianade overnight in the fridge - turning every few hours (except when you're sleeping) - to achieve an even coating.


Next day (about 9 hours before you want to serve dinner), in your favorite dutch oven - sautee two small onions and 4 -5 chopped garlic cloves in a bit of olive oil. Layer the marianated pork ribs on top of the onions and garlic base - cover - and place in a preheated 275 degree oven, for 4 hours. (I used this method to cook the ribs, get the fat out, and drain it before adding in the sauce base to finish it off.)

Remove from oven, un-lid, and let cool for a bit (until the earlier of a: you can either handle the ribs to remove any excess fat chunks or b: you can't resist tasting the pork rib -


I'm guessing you'll burn your fingers a bit because you can't resist tasting the delicious pork!). I tried to be very gentle with the ribs because I didn't want to "shread" the meat, but rather wanted chunks of pork ribs - smotherer in the yummy Soyaki sauce. Drain the fat and the onions/garlic from your dutch oven.


Put the trimmed pork ribs back in the dutch oven and pour the rest of the Soyaki (or the balance of your homemade marianade)
over the ribs - put the lid back on, and return to the 275 degree oven for another 3 to 4 hours.


Take from the oven, remove the lid and let sit for 20 - 30 minutes - just enough time to sautee the Baby Bok Choy, plate the rice, and serve.