Monday, February 13, 2012

Brittany's Valentines Love Bites

Here's a great idea to make a yummy Valentine's treat for that special someone in your life, or for yourself if you are a narcissist.  My niece Brittany made them for her hubby of 5 months (yes, folks who are married for just 5 months do these sweet things for each other - I'm going to remind Brian that he has physical therapy appointment - people who have been together for 22 years do THESE things for each other).  Perhaps I should consider making a batch of Brittany's Valentines Love Bites for Brian.  I only saw these in their finished state, and Brittany did not realize that she should have photo-documented the entire process.

But they're pretty simple, so hopefully you too can do this at home.

Ingredients:

Square shaped Pretzels (Brittany used "Butter Snaps" by Hanover

M & M's - preferably the Valentines special package of reds, pinks and whites.

Hersey's "Hugs" and "Kisses" - the Hugs melt easier than the kisses.


Turn your oven on 200 degrees.  On a baking tin, arrange square cut pretzels, as many as you want to make.  Place a Hug or a Kiss on each pretzel.

Place in the oven for 4 - 5  minutes, until the chocolate is shiny and soft, but still holds its shape.
This will make the Hugs and Kisses squishy soft.

Remove from oven, place an M & M candy on each one, pushing the M & M down to flatten
the Hugs and Kisses.

Let cool in the refrigerator.

Give them to your loved one, and see what you get back in return for the deliciousness!

Happy Valentines Day from Gourmet Gibbs and Brittany.

Sunday, January 29, 2012

Cinnamon-Sugar Apple Baked Brie


Cinnamon Apple Baked Brie
With the Super Bowl fast approaching, it’s always a good idea to have something new to put out as snack food.  I’m going to recommend Cinnamon Apple Baked Brie.  I had intended to post this closer to New Year’s (when I prepared it), but I’ve been procrastinating my blogging duties.  NO MORE!


Ingredients are at a minimum:  
1 small to medium round of Brie cheese
(if you can’t find a “round” you can put 2 or 3 triangle cuts together)
2 apples 
3 Tablespoons butter
Cinnamon-sugar spice
(I actually have a jar of pre-prepared cinnamon sugar - but if you don’t
just sprinkle in equal amounts of sugar and cinnamon)


If using frozen puff pastry, leave the box in the fridge overnight to thaw, and remove from the fridge 15 - 30 minutes before your ready to use it to bring it to room temperature.  Set the Brie out to come to room temperature as well.
Core and thinly slice the apples.

Melt butter in a large pan, then add the apples and sprinkle
with cinnamon-sugar spice.  
Sauté until the apples are cooked through
and the cinnamon-sugar begins to caramelize.  


Remove the cooked apples toa plate and let cool.
Lightly flour your baking dish and carefully unwrap the puff pastry dough into your pan.
(Because the Brie will ooze out once cooked, you’ll want to use a baking pan that’s at least 1 to 2 inches deep.)

Place the Brie on the pastry, 
then carefully arrange the apple slices 
across the top, fanning them out like so...

Fold the puff pastry up over the
sides of the Brie, and pinch together in an interesting looking pattern.  Brush the pastry dough with a light coating of beaten egg.
Bake according to the puff pastry package directions 
(if I remember correctly it was 20 - 25 minutes in a pre-heated 400 degree oven - you want the puff pastry to nicely brown, without burning.  I probably could have let mine cook a bit longer, as the bottom of the pastry crust was a bit doughy)
Serve with crackers, and a napkin!

Wednesday, December 28, 2011

Mac 'N Cheese

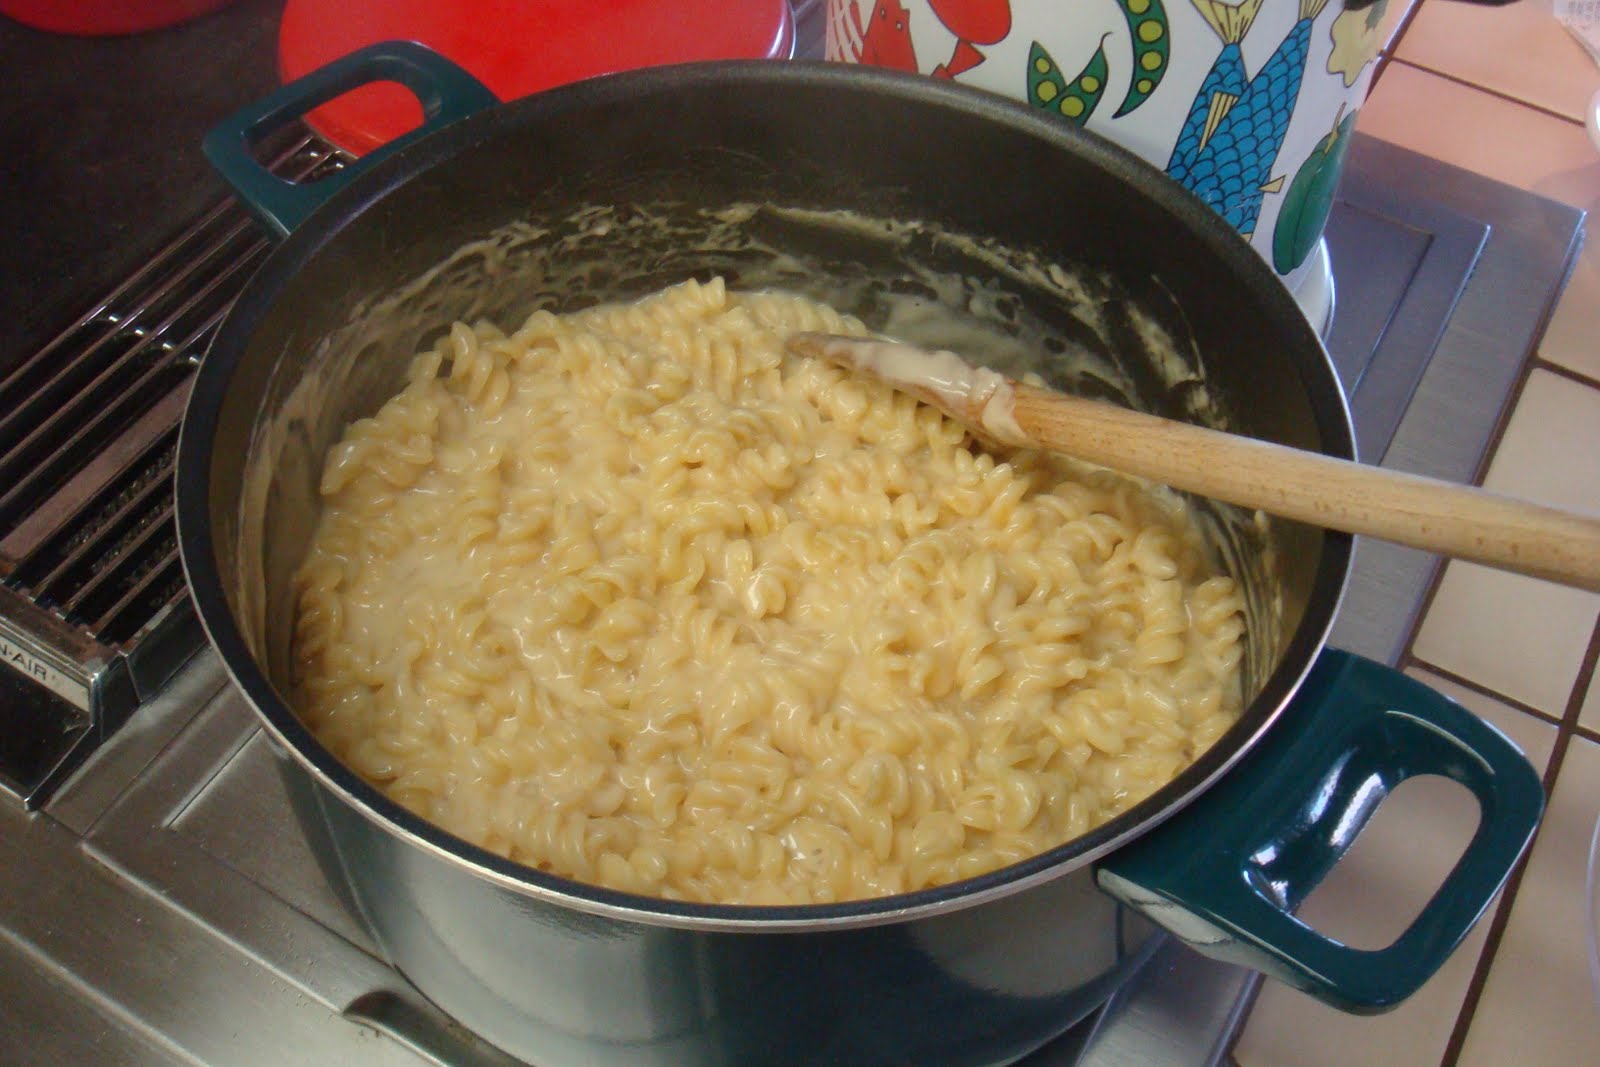
My assignment for the Monson Christmas Eve Dinner this year was Mac ‘N Cheese – popular with the kids and vegetarians in the family - and a favorite of mine that I had never before made from scratch. I didn’t have a recipe with me, I certainly wasn’t going to use Kraft, and I wasn’t excited about searching the internet on the small screen of my iPhone, so I turned to the ever-reliable “Bunny” in Seattle. Bunny’s always good for suggesting a recipe or two or even three when you need one. For macaroni and cheese, Bunny offered a recipe out of a cookbook from which he has enjoyed other recipes, although he had never made this particular recipe.

The deciding factor between Bunny’s recommended recipe and the one Brian found in the “Food and Wine” magazine at mom’s house is the “one pot” ease of Bunny’s – the pasta cooks in the same pot. (What my mom is doing with a “Food and Wine” magazine is an entirely separate subject.) Here’s what you’ll need:

A large, non stick skillet (I doubled the recipe, so I used a large non-stick stock pot)
3½ cups water, plus extra as needed
1 (12-ounce) can evaporated milk (NOT sweetened condensed!)
12 ounces (about 3 cups) elbow macaroni
Salt
1 teaspoon cornstarch
½ teaspoon dry mustard
¼ teaspoon hot sauce
6 ounces cheddar cheese, shredded (1½ cups)
6 ounces Monterey Jack cheese, shredded (1½ cups)
3 tablespoons unsalted butter
Ground black pepper

Bring 3½ cups water, 1 cup of the evaporated milk, the macaroni, and ½ teaspoon salt to a simmer in a 12-inch nonstick skillet over high heat. Cook at a vigorous simmer, stirring often, until the macaroni is tender and the liquid has thickened, 9 to 12 minutes.


Whisk the remaining ½ cup evaporated milk, the cornstarch, mustard, and hot sauce together in a small bowl, then stir into the skillet.


Continue to simmer until slightly thickened, about 1 minute. (Okay – here I realize that I have misled you – you will need to dirty a second bowl. And a word of caution – DON’T mix the cornstarch ingredients until you’re ready to stir it into the pasta – otherwise it will thicken up on you!)
Remove the pan/pot from the heat, then stir in the cheddar and Monterey Jack, one handful at a time, adding water as needed to adjust the consistency of the sauce.


Stir in the butter, season with salt and pepper to taste, and serve.

A couple of “off the recipe” notes from Gourmet Gibbs. I didn’t want the pasta to be too “al dente” so I tested it after the suggested time, and continued to cook it for a few to several more minutes. That turned out to be unnecessary, as it continued to cook during the “off heat” process. Also, I prepared the dish prior to the “plate and serve” stage, so I transferred the macaroni and cheese to an oven safe bowl, covered with foil, and put in the warming oven until the whole family was seated at the table and it was time to eat.

Serving suggestion: with Ham, Sweet Potatoes, Polenta Cakes with Sauted Herbed Mushrooms. YUMMY!

Everyone loved the flavor of the Mac N’ Cheese, especially the kids; if you are preparing this for a strictly “adult” crowd, I might get a little more adventurous with the selection of cheeses to use.

Sunday, December 11, 2011

Tree Trimmin' Clam Dip

Tis the season to Trim the Tree! And if you're going to invite your friend over to do the job (like we do), you'd better have something for them to nibble on, in addition to the cocktails they expect. We have a tradition in our house - invite friends over to hang the ornaments, give them some munchies to accompany their cocktails, and then order PIZZA after the tree is trimmed.


This year was no exception. In addition to the annual "Bacon Wrapped Water Chestnuts" - see post from a LONG time ago - I decided to serve a simple Clam Dip with Pita and Potato Chips. I thought of this because at a recent UTAH football tailgate party, Megan brought her mom's yummy clam dip - and it was delicious. Sonja's Clam Dip is "oh-so-simple" -

2 cans of minced clams, drained (reserve liquid)

2 bars of Philidelphia Cream Cheese, softened

Mix together, and stir in just enough clam juice to get desired consistency.


Way too simple for Gourmet Gibbs, so I tried to complicate it by adding more,and swapping out a bit:


8 ounce (1 package) cream cheese - softened
1 cup sour cream
2 (6 1/2 ounce) cans clams - one chopped, one diced, drained, juice reserved
2 tablespoons Worcestershire sauce
1/2 teaspoon salt
1/4 teaspoon black pepper
1/2 can (small) diced jalapeno peppers
splash hot sauce/tabasco
splash lemon juice
3 tablespoons clam juice.


Mix cream cheese with sour cream, until smooth with no chunks. I used a whisk, but when I do this again, I might consider an electric or battery powered mixer - my arms were POOPED.


Add in Worcestershire sauce, claim juice, tabasco, lemon juice, salt and pepper, and continue mixing.


Add clams, mix, and if necessary or desired, add a bit more clam juice. Remember - the dip will solidify a bit as it cools in the fridge.


I made half without chilies, and stirred in the diced jalapenos into the second half. The jalapeno version was preferred heavily over the original version.


Serve with your favorite Pita and Potato Chips,


and be sure to set out napkins so your guests don't get dip on the ornaments to go on the tree. Oh, and don't forget to order the PIZZA!

Monday, November 28, 2011

Asparagus with Miso and Almonds, AKA "Not your Mother's Green Bean Casserole"

The following is NOT just a recipe - it's an ADVENTURE!

For Thanksgiving dinner at Brian's sister Terry's house, I was given my annual assignments - Stuffing and Green Bean Casserole. (Both of these have been covered in prior Gourmet Gibbs Blog posts.) This year I wanted to do something novelle with the Green Beans, and Brian found a recipe in "Bon Appetite" that sounded fun - "Green Beans with Miso and Almonds." It kept the standard Green Bean ingredient, but gave it an Asian flare, and I thought - why not try it!

One of the ingredients called for is Miso Paste. I had not heard of this, but the recipe suggested it could be found in natural food stores, Japanese markets, and some better supermarkets. I actually found some at Rock 'n Roll Ralphs in Hollywood, but found a better selection at Whole Foods.


I saved most of my shopping for Thanksgiving morning in Oceanside. I found all the ingredients I needed for Stuffing and for the new Bean dish - all except ONE - GREEN BEANS. Here's a reenactment of my experience at the produce department. I walk up each aisle, and can find no Green Beans. I look in the fresh packaged section for ready to nuke bags of Green Beans, and there are NONE. So I approach the produce lady:

Me: "Where are the fresh Green Beans?" Produce Lady: "We are all out."


Me: "All OUT?" Produce Lady: "Yes, there's a shortage of Green Beans here."


Me: "Would Albertson's have any?" Produce Lady: "I doubt it but you can use the phone up front to call them."


I used my iPhone and called the Albertons - they were completely out, too. So I went back to the produce lady:


Me: "Do you have any of the packaged fresh Green Beans?" Produce Lady: "No. The beans we got in didn't look that great, but they went fast, so I opened the packaged fresh beans and put those out, and those went fast as well."


Me: "Hmph." Produce Lady: "Are you just going to make the standard Green Bean Casserole? You could use frozen."


Me: "Actually, this is the year that I was NOT going to do the Green Bean Casserole."


I explained my recipe, and my hesitation to use frozen Green Beans (they just seem to have both a texture and a flavor that screams: FROZEN!)

Produce Lady: "Sounds interesting. Have you considered Asparagus?" Me: "What a brilliant idea! I love you! Happy Thanksgiving!"


And that's how the traditional Green Bean Casserole became "Not Your Mother's Green Bean Casserole" and is, in fact, not a casserole at all, and doesn't include Green Beans at all! It did earn raves from the dinner crowd, so here's what you need:


2 1/2 lbs. fresh Asparagus
1/4 cup white Miso paste (fermented soybean paste)
3 Tbsp. thinly sliced Scallions, dark green part only, divided (I used a tad more!)

2 Tbsp. unseasoned Rice Vinegar

2 Tbsp. Japanese prepared Hot Mustard (NOT Wasabi), or alternatively
1 Tbsp. English Mustard Powder mixed with 1 Tbsp. water

2 Tbsp. Vegetable Oil
1 Tbsp. Sugar

1/4 cup sliced Almonds, toasted

Wash the Asparagus and either snap or snip the woody ends off (many people claim that if you gently bend the Asparagus spear, it will snap off naturally at the point of yummy Aspargus spear vs. woody tip - but I find this usually results in half the spear being discarded, and I'm just not that picky, so I use a knife and trim off the bottom 3/4 to 1 inch - more on particularly thick spears). You may elect to shave off some of the bottom leaves from the spears.


Wash and steam the Asparagus. I used a handy microwave veggie cooker that Max offered. I cooked the Asparagus in 3 batches - 1 1/2 minutes on high, rolled the Asparagus around, and then another 1 1/2 minutes. If you don't have a microwave veggie cooker, just wrap your Asparagus in plastic wrap with a few sprinkles of water, and zap for probably 2 minutes. You want the Asparagus to be tender, but NOT MUSHY! After you take the Asparagus out of the microwave, run it under cold water, or better yet, drop it into an ice bath - to stop the continued cooking that will occur if you don't. Dry the Asparagus spears on a cloth towel.

Slice the spears in approximate even pieces - either 3 or 4 cuts, depending on the size you want your Asparagus pieces to be. Put the pieces in your serving dish.


In a separate bowl, prepare the Miso paste-based dressing:


Whisk Miso, 2 Tbsp. Scallions, vinegar, mustard, oil and sugar. I also added a Tbsp. of Black Sesame Seeds, for "pop!


Pour the dressing over the Aspargus, then toss to coat.


Garnish with Toasted Almonds and the remaining Scallions. I served the dish at room temperature, and the Turkey Feast Host was thrilled that I didn't have any need for space in the oven, which was already over-filled with other delicious sides that DID need reheating.

Sunday, October 30, 2011

Greg's Beef Barley Stew

We've just returned from a weekend in Salt Lake, cheering on the UTAH UTES to their first Pac-12 conference football victory - FINALLY.


It was Blackout Game - where everyone was encouraged to wear all black - and even though I thought it was kind of a silly concept, I have to admit that the stadium crowd looked awesome.

Prior to the game Megan offered to set up a tailgate party at her primo parking space, which was fabulous.

And after the game we took the party back to Greg and Megan's house, where Greg treated us to a fabulous Beef Barley Stew that he had cooked while we all watched the game in the cold and he enjoyed it on KJAZZ TV. Greg's stew is incredibly delicious, and perhaps if there are a few requests for it in the "comment" section, I can talk him into sharing it soon!

Another recipe-focused Gourmet Gibbs will be posted within days... really!