Sunday, August 29, 2010

Cheese Biscuits

In a continuing celebration of Joey Roo's birthday, this week I'm sharing the recipe for Cheese Biscuits. As you may recall, we had a birthday dinner of crock pot meatloaf, beets with goat cheese, and cheese biscuits. With this recipe, in addition to the past two blog entries, you can now replicate the entire meal! Least you think I'm dragging this event out - I must remind you of the "Birthday Period Rule" - this Rule dictates that you celebrate your birthday from the first national holiday before your birthday, to the next national holiday after your birthday. So Joey's "Birthday Period" is from Independence Day through Labor Day (oh, the same as mine.)

I used a recipe called "Quick and Easy Cheese Bread" - and modified it as I felt appropriate; I also turned it into biscuits, as opposed to a loaf of bread.

Here are the simple ingredients you'll need:

1 and 3/4 cups all-purpose flour
1/8 cup white sugar
1 and 1/2 teaspoons baking powder
3/4 teaspoon salt
2 cups shredded sharp (or extra sharp) cheddar cheese
1 egg, beaten
3/4 cup milk
1/3 cup vegetable oil

Preheat oven to 400 degrees. Line muffin/biscuit pans with paper cupcake wrappers (you could just spray the pans with PAM, or some other greasing type agent - but I wanted to serve these biscuits in paper wrappers).

In a medium bowl, mix the flour, sugar, baking powder, salt and cheese. In another larger bowl, beat the egg together with milk and oil. Stir in the the flour/cheese mixture into the egg mixture - stirring just until moistened.

Spoon the batter into the wrappers - filling about 2/3 full.


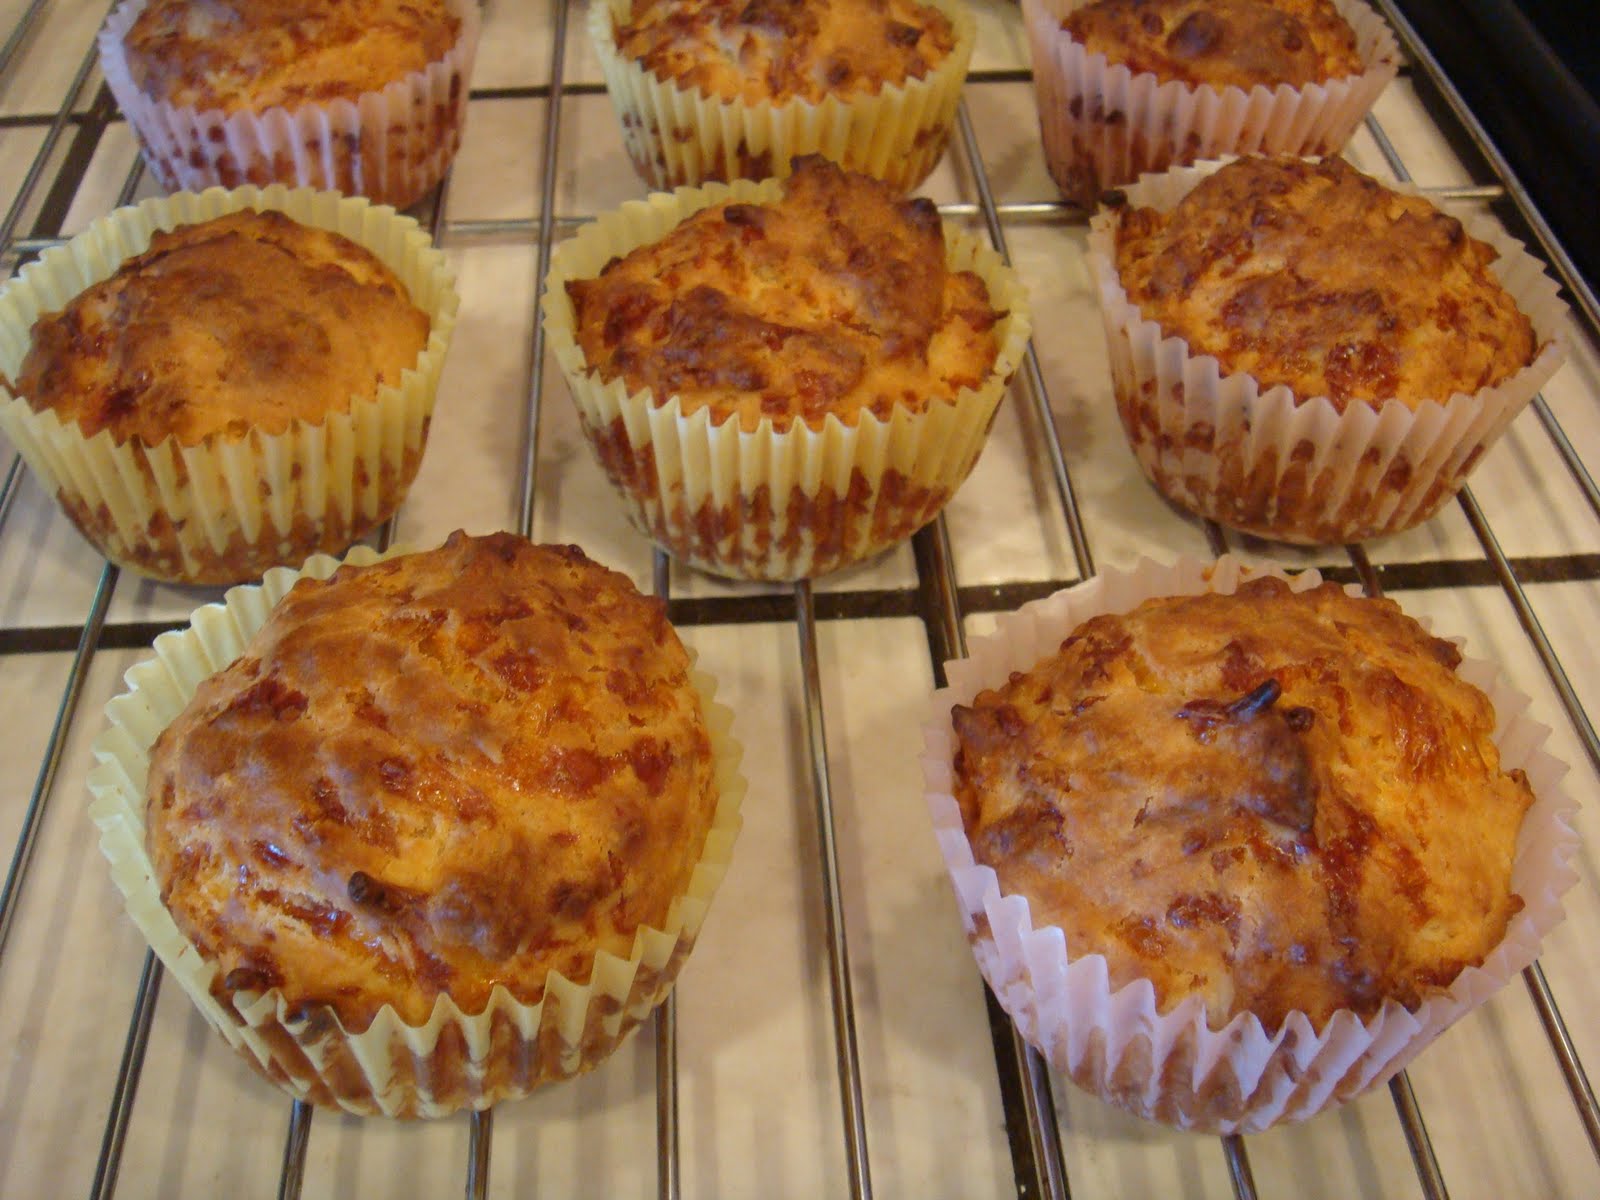
Bake in your pre-heated oven for 20 - 25 minutes - or longer if needed. Use the handy toothpick test - the biscuit is done when a toothpick inserted into the center of the biscuit comes out clean. Remove from oven - let cool in the pan for about 10 minutes, then finish cooling on a rack.


YUMMY!


Sunday, August 22, 2010

Beets With Goat Cheese

Last week I teased you with photos of "Beets with Goat Cheese" - and this week, I'm going to share my own very simple recipe. My desire to slice and layer beets and goat cheese all started with a trip to Spago of Beverly Hills - our friend Mark recently treated us to lunch at this very fine eating establishment, and one of the appetizers we shared for the table was Beets with Goat Cheese. Of course it wasn't called that, it had a fancy and expensive name: "Roasted Chino Farm's Beet Layer Cake, with Warm Sauteed Goat Cheese, Toasted Hazelnuts and Shallot Citrus Dressing."

I'm sure this would be amazing with your own roasted beets - but I've never roasted a beet, and wouldn't even know where to begin - so I use Trader Joe's Beets. They are found in the fresh produce section, and come in a vacuum packed bag, with a fridge life of about 2 months. I also bought a goat cheese from Trader Joe's - but you can be fancy and get a better goat cheese from your favorite cheese shop. Before you begin the beet preparation, put the goat cheese out to bring it to room temperature for easy spreading.

Wash and drain the beets, then thoroughly dry them. Once dry, cut one small end off the bottom - preferably where the root was attached, as this small section can be a bit grainy. The flat surface is essential to your tiering of the beet.

Next slice the beet into 5 or 6 slices - depending on the size of the beet. Re-stack each slice in the same position it was sliced off. You'll want to slice and stack all of your beets BEFORE you get your fingers all messy with the goat cheese application.

Lift all the layers off the bottom layer of the first beet; drop a dollop of goat cheese on the top of the bottom layer, and spread over the beet (I initially thought I'd be spreading with a knife, but after two layers of the first beet, I learned that dropping the dollop with the knife and then finger spreading is my preferred application method). Put the next layer on top of the first layer, and repeat the spreading process. Repeat for each layer, until you cap the tiered beet with the top slice. Use your finger to smooth out the goat cheese on the sides, and rub off any goat cheese from the sides of the beet layers (OOPS, I missed a little bit on the side!).

Repeat for each beet - then arrange them on a lovely serving tray. Cover with plastic wrap and store in the fridge until you're ready to serve. Before serving, take out of the fridge to let the beets come back to room temperature. Serve with a drizzle of balsamic vinegar over each beet cake.
I also recommend serving with a steak knife, so you can slice easily through the beet and admire the inter layered tiers of beets and goat cheese.
DELICIOUS, and oh-so-pretty, too. Enjoy.

Sunday, August 15, 2010

Roo's Birthday Meatloaf

Joey's birthday was last Thursday - and he requested MEATLOAF for his B-Day dinner. I had never in my life made meatloaf, so of course I volunteered to experiment with meatloaf and make it a special day for him. My version is called "Roo's Meatloaf" because a baby kangaroo (Roo) is called a "Joey." The meatloaf does NOT contain kangaroo meat (although it might if I lived Down-Under, mate).
We had already planned to meet for cocktails after "work" and I didn't want to have to come home and wait for 1 1/2 - 2 hours for dinner while the meatloaf cooked, so I researched Crock pot Meatloaf - yes, if you can imagine it, you can find it on the Internet! Using the crock pot method, I could put it all together, start the cooking process, and come home - AFTER cocktails - and have dinner ready in a flash.

Crock pot Meatloaf:
1 lb ground sirloin
1 lb ground pork
1 lb ground veal
5 cloves garlic, chopped
4 - 5 stalks celery
1 medium red onion
1 medium yellow onion
1 1/3 cups seasoned bread crumbs
1 1/2 cups milk
1/2 cup catsup
4 eggs, beaten
1 cup grated Parmesan cheese
1 teaspoon fines herbs
2 teaspoons salt
1/2 teaspoon black pepper
2 tablespoons worcestershire sauce
sprinkle cayenne pepper
sprinkle chili powder

Sauce:
1 cup catsup
2 BIG dashes worcestershire sauce
2 BIG dashes hot sauce
4 teaspoons brown sugar
1 1/2 teaspoons dry mustard
adjust to taste!

Chop the onions, celery and garlic. In a large pot, melt a pat of butter and saute half the onions and celery, and all the garlic. Set aside to cool - because you're going to use the big pot to mix the rest of the ingredients and make the meatloaf.

When the pan has cooled, stir in the rest of the onion and celery. Add the remaining ingredients for the meatloaf, with the exception of the bread crumbs and the 3 meats. Stir it all together, then stir in the bread crumbs.

Add ground sirloin, pork and veal and mix gently with your hands (spray a light application of Pam directly on your hands to reduce sticking. Thoroughly mix the meat into the wet ingredients, but be careful not to "squeeze" the meat/mixture - that will cause your meatloaf to be too dense.
I don't have a rack that fits into my crock pot - so I used onions - I trimmed 4 onions the same size, and put these on the bottom of the crock. Next I cut a large piece of heavy foil - large enough rise above the rim of the crock - this comes in handy for getting the meatloaf out of the pot when it's cooked! Poke holes in the bottom of the foil so the fat can drain out of the meat, into the crock.
(the onions you see to the left are the result of the cooking)

Scoop in your meatloaf goop! And if you try this method - you'll know exactly what I mean. I filled the crock to the top - and had too much meatloaf goop.

So in addition to the crock pot method, I shaped the remaining meatloaf goop into a loaf and baked it in the oven, over a foil covered tray, at 350 degrees - but that's going a bit off topic.
Cover the crock and set on low - then cook for 8 hours or so. I was running a bit behind schedule so I cooked mine on high for 2 hours, then turned it down to low for the remaining 4 hours.
To make the sauce, just whisk all the ingredients together, and adjust to your own taste. About an hour into the cooking process, spread a thin layer over the top (I didn't have room to spread it on the sides - but if you can, do. Same for the oven-baked meatloaf - spread thin layer on about 30 minutes into the cooking). When you take your loaf out to rest, spread another layer on. Serve remaining sauce with the meal, for people to add as much or little as they like.
When you get home from cocktails - carefully lift up your foil tray and let the meatloaf rest for 20 - 30 minutes - otherwise, when you slice it, it will just fall apart - still tasty, but not as aesthetically pleasing :)


To round out Roo's B-Day dinner, we started with Beet Cake - beets layered with goat cheese, then drizzled with Balsalmic vinegar. Mark brought Cheesey Potatos - and I made Cheese Rolls. If anyone is interested, I'll post these additional recipes in future posts.


We enjoyed a delicious dinner - Joey was completely satisfied with the crock pot method meatloaf - and ended the evening with pound cake, fresh strawberries and whipped cream. YUMMY-DELICIOUS !

Sunday, August 8, 2010

Bea's Banana Nut Bread

I'm very particular about my bananas - and when the get even the slightest past "ripe" - I consider them inedible and too mushy - PERFECT for Bea's Banana Nut Bread. The recipe is actually from the "Better Homes and Gardens - New Cook Book" - but Brian's the one who always makes banana nut bread at our house, so it's Bea's BNB.
Here's what you'll need: (and I doubled it so I could make two loaves)

1 and 3/4 cups all purpose flour
1 and 1/4 teaspoons baking powder
1/2 teaspoon baking soda
3/4 teaspoon salt
2/3 cup sugar
1/3 cup butter
2 eggs
2 tablespoons milk
1 cup mashed ripe banana
1/4 cup chopped nuts

Preheat oven to 350 degrees. Stir together flour, baking powder, baking soda and salt. Set aside.


In your mixer (and here's where I'll share a little secret with you - I wanted to find a recipe that didn't require a mixer, and they ARE out there, but Bea said that he always uses the mixer, and if this was going to be called "Bea's Banana Nut Bread" - I needed to make it the way he does - so I did.)
In the mixer bowl beat sugar and butter till light, scraping sides of the bowl often. Add eggs, one at a time, and the mik, beating till smooth after each addition. Add flour mixture and banana alternately to creamed mixture, beating till smooth after each addition.

Fold in chopped nuts.

Turn batter into a lightly greased loaf pan. Bake in 350 degree oven for 60 to 65 minutes, or till wooden toothpick inserted near center comes out clean (this was about 45 - 50 minutes for me!)

Cool in pan 10 minutes, then remove from pan and cool completely. Wrap and store overnight.


Enjoy the next morning for breakfast, with juice, bacon, coffee and a hard boiled egg. Oh, didn't I mention how to boil an egg?

Sunday, August 1, 2010

Grilled Tuna Melt Sandwiches

Who doesn't love a tuna salad sandwich? And who doesn't love a grilled cheese sandwich? So why not combine the two and make Grilled Tuna Melt sandwiches at home? It's quick, it's easy, and it's DELICIOUS.

I neglected to take photos of the tuna salad preparation, but come on, you all know how to make tuna salad. Drain one 7 ounce can on white solid tuna; chop one stalk celery, two or three scallions, and one medium dill pickle.

In a small glass bowl mix the tuna, celery, scallions, pickle and a scoop or two of mayonnaise (depending on how mayo-ey you want your tuna salad - since we're going to grill these, I recommend a bit less mayo than you might use on your afternoon sandwich), lightly seasoned with salt and pepper to taste. I've found this is just the right amount of tuna salad to make three sandwiches.


I prefer sourdough bread for my grilled sandwiches, but usually have some 7 or 12 grain bread readily on hand in the kitchen, and that's what I used this time. The secret to these sandwiches is in the construction (which I just recently learned from my mother). Using room temperature butter (or some butter substitute is you insist on being healthier), lightly spread butter on the grilling side of each piece of bread. Now here's the construction trick - put the two slices of bread together, butter side to butter side, for each sandwich. This process lets you layer the sandwich fixin's, without getting butter all over your hands - and you know what I'm talking about.
First lay a slice of cheese on the top slice of bread. I suggest Swiss cheese for Tuna Melts. Then spread a modest amount of tuna salad on top of the cheese. Next, top with another slice of cheese.
Carefully peel the "loaded" slice of bread from the bottom slice, and place on a heated griddle, medium low heat. Then flip the bottom slice, and place on top of the slice on the griddle, butter side up. Let your sandwich grill for a few minutes - checking if you must to ensure that your griddle isn't so hot that it burns the butter before the cheese gets a chance to melt.
When the first side is a nice, delicious-looking golden brown, turn the sandwich and brown the other side. Meanwhile, the heat will soak through to the Swiss cheese to melt it and make it all gooey and yummy.

Remove the sandwiches from the griddle, let sit a few minutes on your cutting board (so the cheese doesn't completely ooze out), then slice in half. Enjoy one, two, or even three halves of a sandwich for dinner.
I recommend a simple salad as the appropriate accompaniment to this meal.